How To Remove Sliding Glass Doors?

Removing a sliding glass door may appear challenging initially, but it may be pretty simple if you have the right tools and a thorough how-to manual. Knowing how to replace an old door, mend something, or create extra space for furniture rearranging is essential.
This post will lead you through the required procedures while answering frequently asked questions and possible problems that can come up. These instructions are designed to make removing sliding glass doors as easy and hassle-free as possible, starting with setting up your workplace and ending with handling the doors carefully.
Tools & Safety Considerations
Necessary Tools and Materials
Screwdriver: You will need a Phillips (cross-shaped) and a flathead screwdriver.
Pry Bar: This tool will help you gently separate stuck parts.
Utility Knife: Useful for cutting seals or caulk.
Gloves and Safety Goggles: Wear these to protect your hands and eyes.
Tape Measure: Handy for measuring parts and spaces.
Lubricant Spray: Helps to loosen any stuck screws or parts.
Drop Cloth: Use this to cover the floor and keep it clean.
Ensure Safety
Wear Gloves and Safety Goggles: Always protect your hands and eyes to prevent injuries.
Clear the Work Area: Ensure no obstacles or debris around you to reduce the risk of tripping or accidents.
Prepare the Work Area
Place a Drop Cloth: To prevent dust and scratches on your floor, place a towel or old sheet down.
Remove any obstructions and furniture: To provide adequate room to work comfortably, move any furniture or other items away from the door’s proximity.
Removing the Sliding Panel

Check for Security Stops
- Look at the top of the sliding door to see if any small blocks or screws are keeping the door in place.
- Use a Phillips head screwdriver to take out these screws or blocks.
When removing the sliding panel, the first step is to check for security stops. These are small blocks or screws typically located at the top frame of the sliding door. They serve the purpose of preventing the door from being lifted out of its track unintentionally.
Begin by scrutinizing the top frame to identify any such obstructions. With a Phillips head screwdriver, remove the screws or blocks, making sure to put them aside in a safe place, as they might be needed later if the door is to be reinstalled.
Lift Out the Sliding Panel
- Open the sliding door.
- Lift the door upwards so that the bottom wheels come off the track.
- Carefully pull the bottom of the door towards you and then remove it from the frame. Do this slowly, and if possible, have someone help you.
Once the security stops are removed, slightly open the sliding door to get a better grip, hold it firmly, and lift it upwards to disengage the bottom rollers from the track. The door should slightly rise, making it possible to tilt the bottom part outwards. Carefully guide the door out of the frame by pulling the bottom towards you.
Due to its weight and size, it’s advisable to have a second person assist with this step to avoid injury or damage to the door. Move slowly and deliberately to ensure the door panel is safely removed.
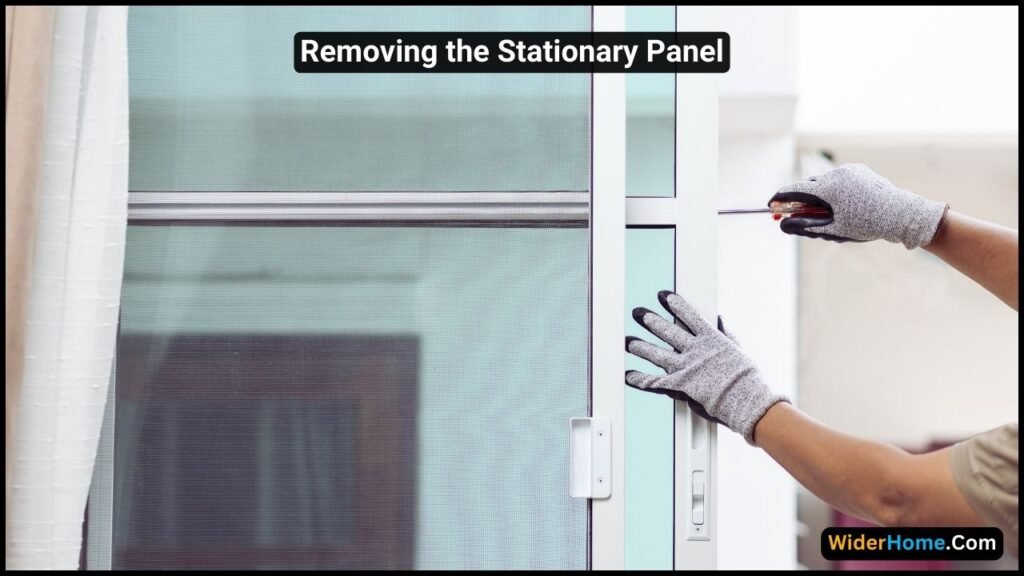
Removing the Stationary Panel

Remove Securing Screws or Brackets
- Locate and remove screws or brackets holding the stationary panel in place
- Use a screwdriver to loosen and remove these fasteners
Removing the stationary panel requires a few critical steps to ensure a smooth and safe process. Begin by inspecting the stationary panel to locate any screws or brackets that secure it to the frame. These fasteners are often distributed along the edges of the panel and may be hidden beneath trim or moulding. Using a screwdriver, carefully loosen and remove all these screws or brackets.
Disengage the Panel from the Track
- Pry off any trim or moulding around the stationary panel using a pry bar
- Carefully lift and slide the panel to remove it from the frame
Step two is to take the stationary panel out of its track by unscrewing the brackets or screws. Using a pry bar, begin by prying off any trim or moulding surrounding the panel. This makes the panel’s edges visible and easy to manage.
After removing the moulding or trim, carefully raise the panel and extract it from the frame. Take your time and be aware of its weight to prevent damaging the panel or the surrounding structure. Having an extra set of hands can be beneficial during this step to help manage the panel’s size and weight.
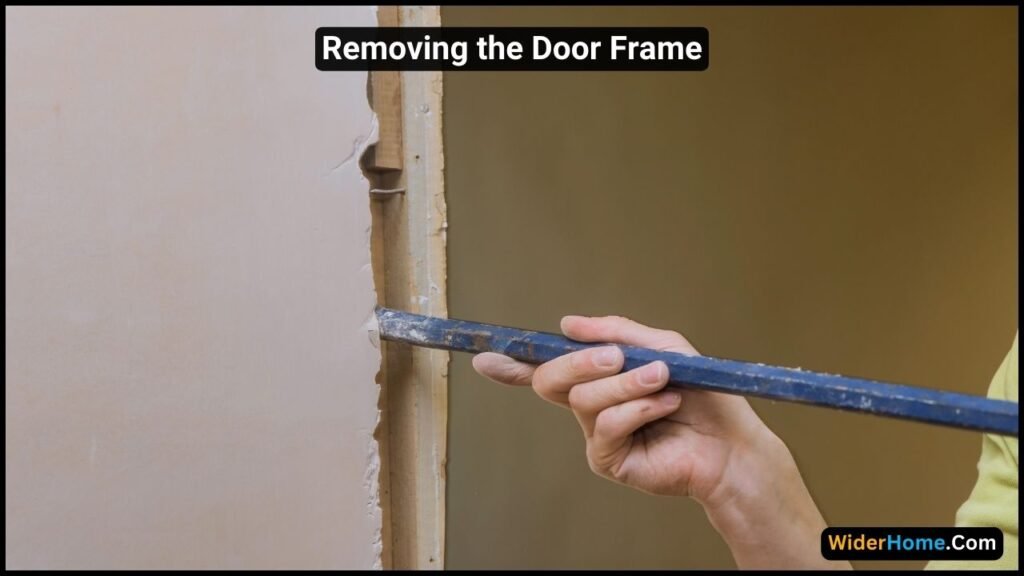
Removing the Door Frame

Check the Frame for Attachments
- Examine the area for any brackets, screws, or nails holding the frame in place.
- To remove these, use instruments like a hammer or screwdriver.
Look around the door frame to make sure no fasteners are holding it to the wall, such as screws, nails, or brackets, before beginning to remove it. Take a cautious look—these could be concealed by moulding or trim. Utilize appropriate instruments, like a hammer or screwdriver, to extract these fragments without damaging nearby objects.
Loosen the Frame
- Begin at one corner and work your way around.
- Use a pry bar to separate the frame from the wall carefully.
It’s time to loosen the frame after removing all of the screws and nails. Start with a corner of the door frame and carefully pull it away from the wall. To assist in making a tiny space between the frame and the wall, use a pry bar, which is a flat instrument. Move slowly and avoid forcing it so you don’t break the wood.
Remove the Frame
- Pull the frame away from the wall slowly.
- Ask someone to help because the frame might be heavy.
Once it has been loosened, the frame can be removed from the wall. Carefully remove it from the aperture to ensure it doesn’t fall and harm someone or anything. Because the frame can be large and heavy, it’s a good idea to enlist the assistance of a friend or family member.
Clean the Area
- Take out any leftover nails, screws, or debris.
- Check if the opening needs any repairs.
Lastly, you must clean the space where the door was after removing the frame. Take out any remaining screws, nails, or wood fragments. Before putting in a new door or window, thoroughly inspect the entrance to see if any damage must be fixed. Ensuring everything is clean and in good shape will help the new installation go smoothly.
Clean-Up and Disposal
Cleaning the area properly is essential once you’ve removed the door frame. First, collect all your tools, such as screwdrivers, hammers, and pry bars, to ensure everything is remembered. Next, collect any waste and place it in a rubbish bag or container. Examples of waste include screws, nails, and shattered wood pieces. A vacuum may help eliminate any remaining dust or tiny particles after using a broom to collect the larger debris pieces.
Finally, dispose of the waste properly by putting the trash bags in your garbage bin and considering taking more significant pieces of wood to a recycling centre. In this method, you’ll have disposed of all the waste products correctly and have a safe and organized workspace.
FAQs (How To Remove Sliding Glass Doors)
How do you remove a sliding door from its track?
A sliding door must be carefully removed from its track with specific attention to detail and a few necessary tools. To provide room for the door to move freely, start by taking out any screws or stops located at the top and sides of the door frame. Once these are removed, carefully lift the door upwards into the upper track.
This should allow you to swing the door’s bottom out and away from the track with adequate clearance at the bottom. Due to its enormous weight and odd design, sliding doors may require assistance to lift and move. After the bottom of the door is accessible from the track, carefully slide the top out and remove the door. Always handle the glass carefully to prevent any accidental breakage or injury.
Can You Remove the Sliding Glass Door to Move Furniture?
Yes, you may remove a sliding glass door and move furniture around. Moving can be easier if heavy or bulky furniture is too big to fit through a regular entrance; pull the sliding glass door. Remove any screen doors first, and then the screws or brackets holding the sliding door in place. After that, carefully manoeuvre the door out of the frame by lifting it higher to free it from the bottom track.
This makes a more prominent space to move even the most significant furniture pieces quickly. Remember to handle the door carefully and consider having someone help you, as sliding doors can be heavy. After shifting your furniture, you can repeat the steps to replace the sliding door.
Can You Replace Sliding Glass Doors Without Replacing the Frame?
Sliding glass doors can be replaced without the need for the complete frame to be replaced. This is frequently a quicker and less expensive solution. To ensure your new sliding doors will fit flawlessly, you must take precise measurements of the current frame. Once you’ve confirmed the measurements, you can remove the old doors by lifting them out of their tracks. After removing the old doors:
- Clean the frame thoroughly, removing any dirt or old sealant.
- Install the new sliding doors by placing them into the tracks and securing them with the proper screws or brackets.
- Ensure all locks and security systems operate correctly, and the doors glide smoothly.
How to Remove a Sliding Glass Door Without Screws?
Sliding glass doors can be replaced without the need for the complete frame to be replaced. Look for mouldings, clips, or covers that keep the door in place before proceeding. Use a flathead screwdriver or a pry bar to remove these elements carefully. Once you can access the top and bottom tracks, gently lift the door straight into the upper track to free the bottom edge.
With the bottom edge lifted, angle it out of the lower track. You may need to wiggle the door slightly to loosen any stubborn spots. Always support the door properly to avoid sudden movements leading to breaks or injuries. Seeking assistance from a second person might make the task safer and easier if the door is difficult to lift.
Conclusion
Congratulations! You’ve successfully removed your sliding glass doors. Please disconnect and remove the doors safely, clean up the area, and prepare it for future installations by following the instructions we’ve laid out. Recall that taking time and paying close attention to each stage will help you prevent mishaps and guarantee that everything goes as planned. You’ll have a tidy and organized workspace if you ever need to install new windows or doors.
